Spearmint Stars C2C Cowl With a Twist!

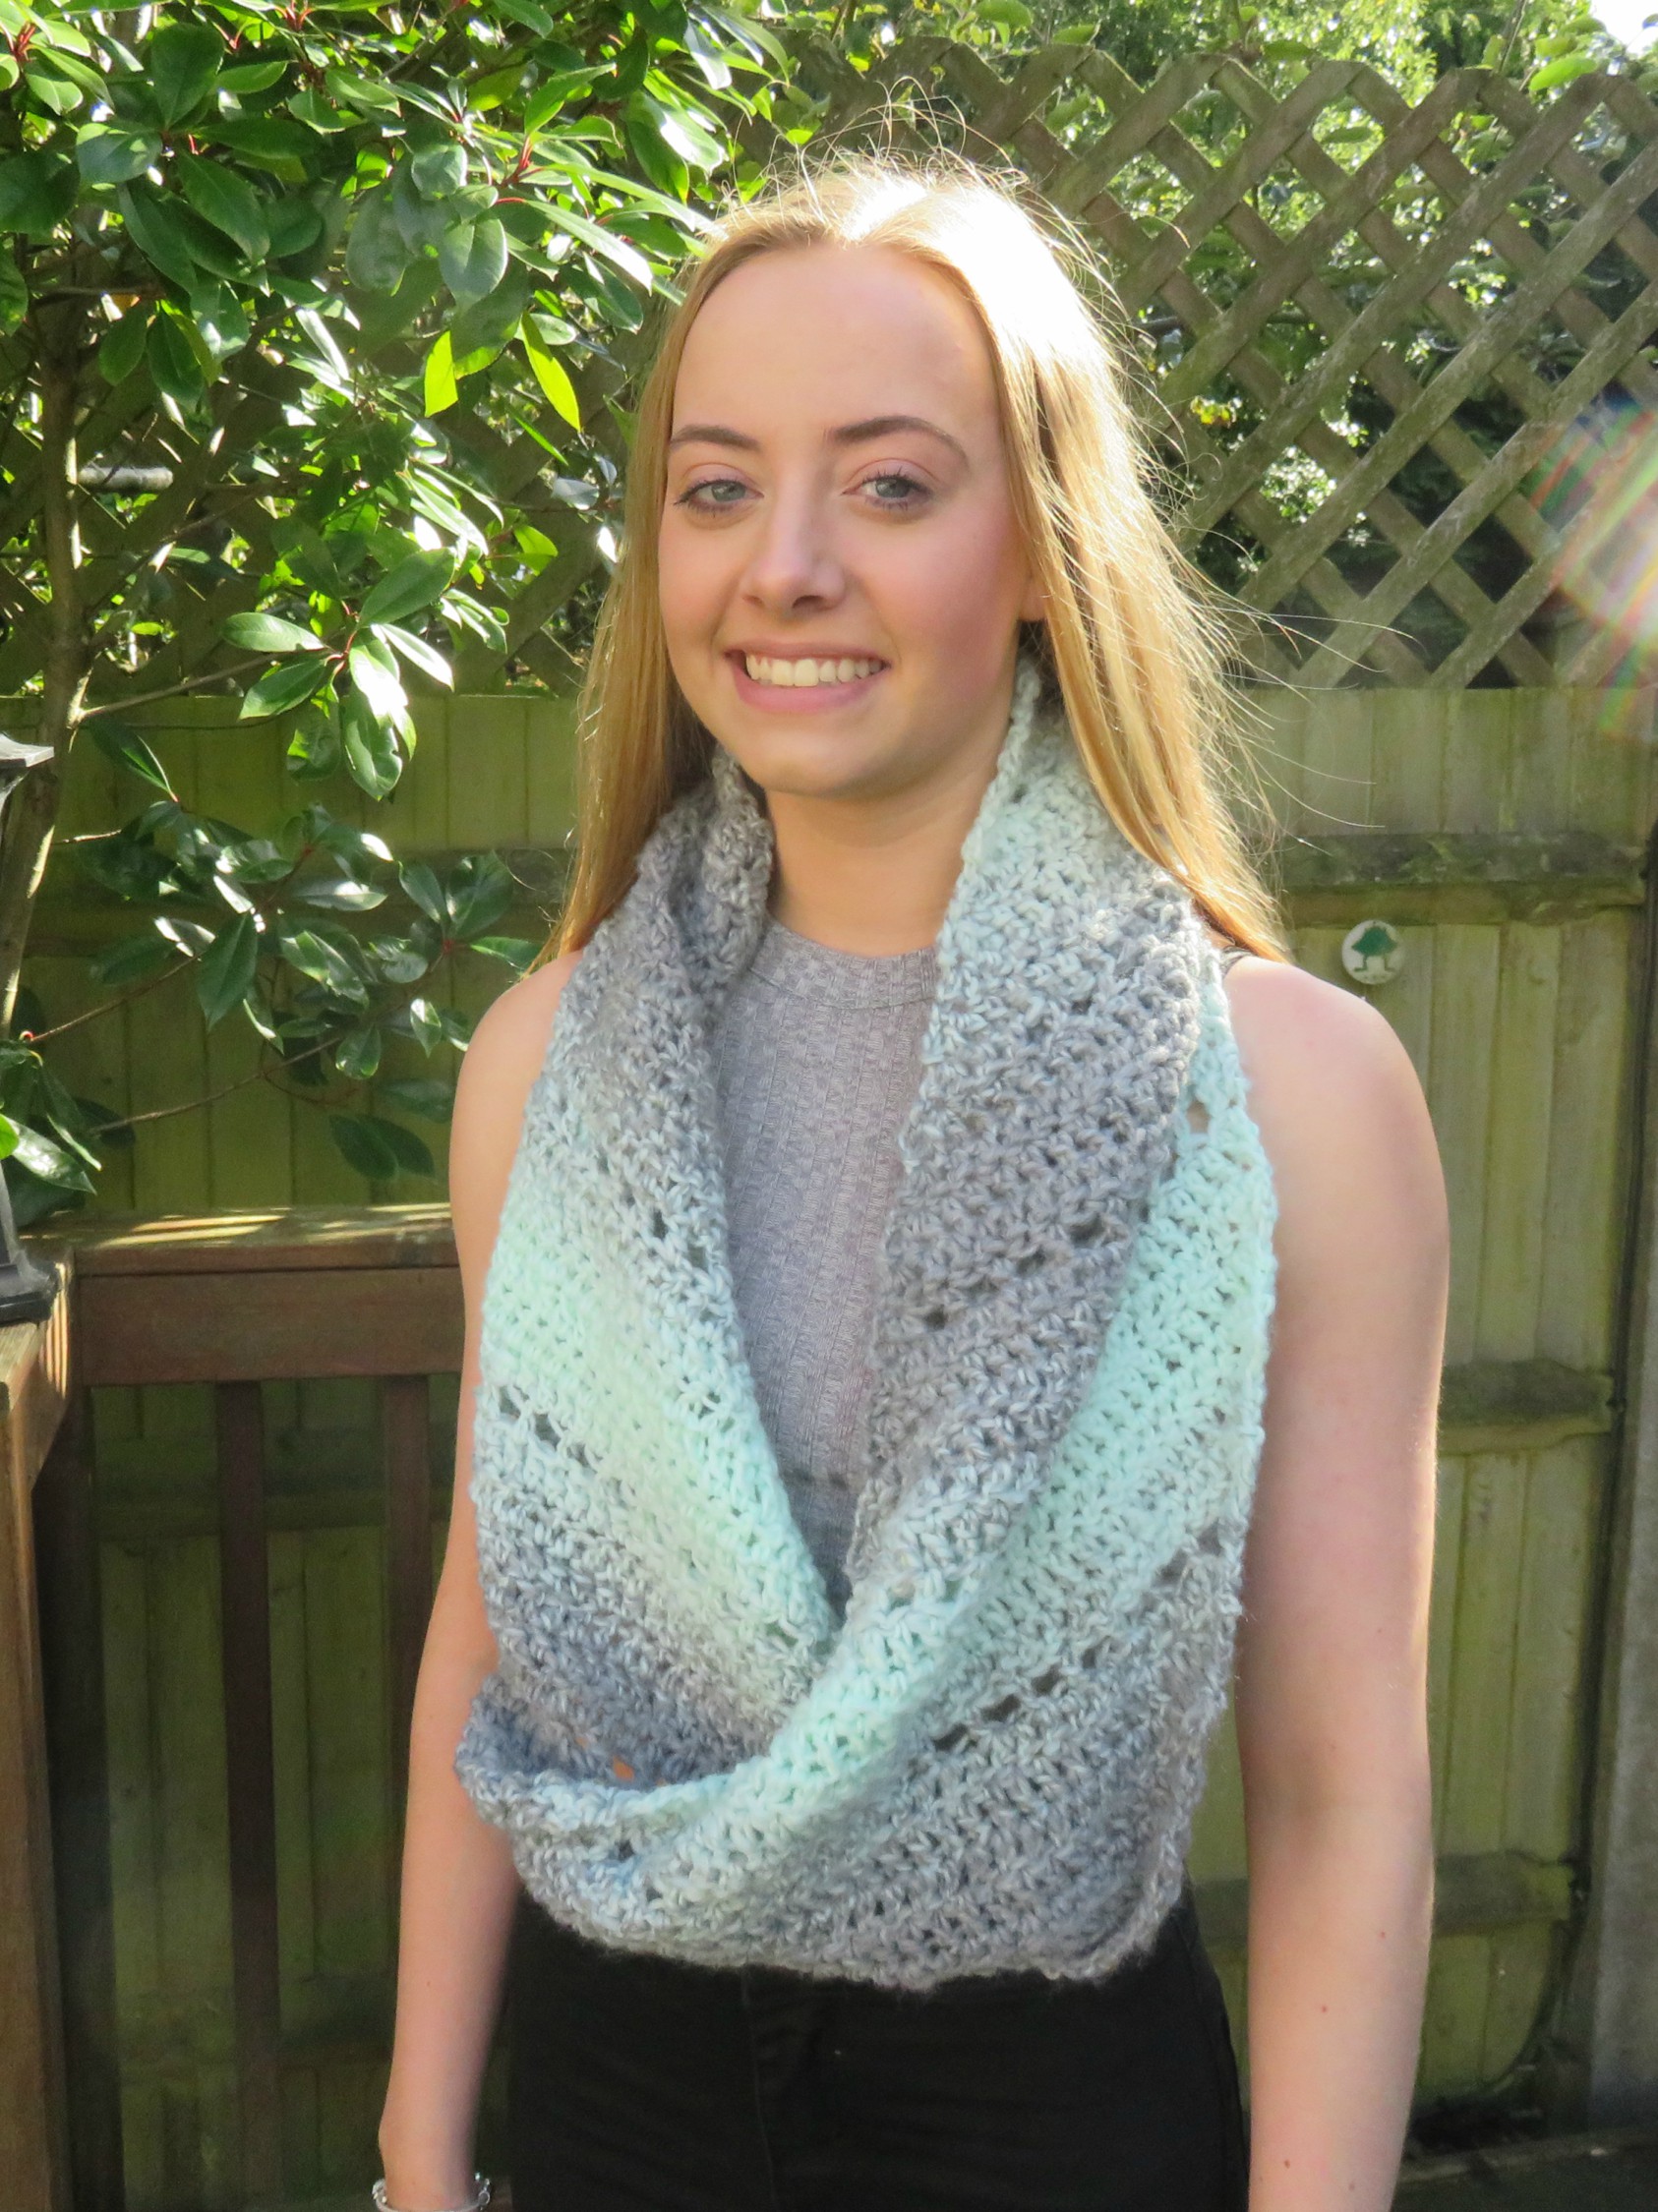
Spearmint Stars C2C Cowl with a twist using Lion Brand Scarfie yarn in Mint/Silver from Crochet 24/7
Corner 2 Corner (C2C) is one of the crochet techniques that I really wanted to give a try, and I have to say, I can see why people say it’s a bit addictive, once you have learned. The first few rows of C2C, it does feel a bit weird, because it’s hard to “see” the shape you are forming. But, once you get to the turn, to maintain the width, it’s really plain sailing from that point onwards.
When I was in Chicago in July, I bought a ball of the Lion Brand Scarfie to bring home to the UK, as it can be both expensive and difficult to order from the UK, plus it’s more difficult online to see the range of colours the ombre will feature.
This really pretty mint and silver I was really drawn to, and if you are tempted to order some from the US, let me reassure you, this yarn is so worth it, it’s really soft (and I don’t usually like any wool content!) 78% acrylic, 18% wool, the colours are soft and muted and blend in well together.
You ladies in the US are so lucky to have the full range of colours to choose from.
As I said, I am new to C2C, so when I was looking through my stash to choose what to use, I pounced on this ball of Scarfie, as I thought it better also to work in a light colour, so I could count my stitches and rows more easily.
I studied the technique, and then decided on using just one stitch the UK TRC or US DC and using the simple chain space, as an added decorative touch.
I met a lovely lady in Chicago whilst I was shopping, who told me she was taught to crochet by her grandmother, but only knew one stitch, and this is probably the case for many who were taught as children by relatives.
As this is a pattern designed for a beginner, I have put more detailed explanations in the pattern, so feel free to skip through if you are more experienced!.
So for all you folks who know one stitch, like to work flat on one piece, use one ball of bulky yarn, and are looking for a project to complete in a weekend!
Here you go, the Spearmint Stars C2C Cowl with a twist!
If you would prefer to purchase an inexpensive pre-formatted PDF then please CLICK HERE to purchase via Ravelry.
Spearmint Stars C2C Cowl
Difficulty Level: – Beginner
Stitches Used: –
USA TERMS UK TERMS
CH – Chain CH – Chain
DC – Double Crochet TRC – Treble Crochet
HDC – Half Double Crochet (seaming only) HTR – Half Treble Crochet
Special Stitches Used : –
UK – TRC DEC:- Treble Crochet decrease worked over 2 stitches
Yarn round hook (yrh) pull loop up from 1st TRC, yrh, pull through first 2 loops on your hook; yrh, pull loop up from next TRC, yrh, pull through first 2 loops on your hook, yrh, pull through 2 loops, yrh, pull through remaining 2 loops.
USA – DC DEC:- Double Crochet decrease worked over 2 stitches
Yarn round hook (yrh) pull loop up from 1st DC, yrh, pull through first 2 loops on your hook; yrh, pull loop up from next DC, yrh, pull through first 2 loops on your hook, yrh, pull through 2 loops, yrh, pull through remaining 2 loops.
Yarn Used: – Lion Brand Scarfie Mint/Silver 150g ball Bulky (5) 78% Acrylic, 22% Wool 312 yards/285m per ball – 1 ball was used for this pattern.
Hook Size Used: – 9mm crochet hook
Gauge: – 4” 10 UK TRC / US DC
Additional Note:-
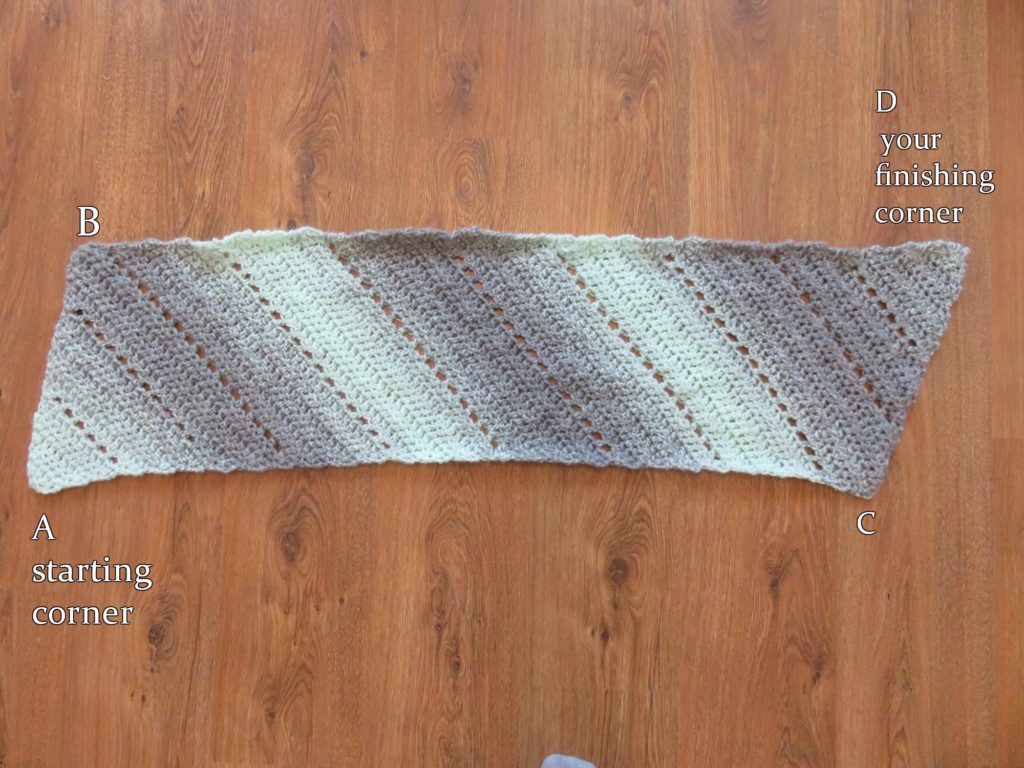
You are beginning in one corner A and making a triangle so increasing; both at the beginning and the end of each row.

Spearmint Stars C2C Cowl with a twist using Lion Brand Scarfie in Mint/Silver from Crochet247
Once you reach your desired width you will stop increasing on both sides, instead you will be increasing on one end of the row, and decreasing at the other end of the row. In this way you are still working at a diagonal, but you are maintaining the width of your cowl. B
When you have the required length C; you will decrease both at the beginning, and at the end of your rows, and you will finally finish in a corner. D
My finished piece laid flat measured 44” long and 12” on my starting end (left in the picture), and 12.5” on my finishing end (on the right in the picture above).
You can see in the picture my finished end is slightly pointier, this could have just been my tension changed. I could have blocked it to make it more even, but as I will be seaming it to the other end, I didn’t worry about it.
Instructions written using USA crochet terms.
CH3 – Does not count as a stitch throughout.
ROW 1:- CH4 (counts as 1st DC this time only), 2 DC 4th CH from hook, turn (3 DC)
ROW 2:- CH3 (remember it does not count), 2 DC in 1st DC (your increase) , DC in next DC, 2 DC (your increase) in last DC, turn (5 DC)
ROW 3:- CH3, 2 DC in 1st DC (your increase) , DC in next DC, and repeat across; 2 DC in last DC (your increase), turn (7 DC)
ROW 4:- Repeat Row 3 (9 DC)
ROW 5:- Repeat Row 3 (11 DC)
ROW 6:– Repeat Row 3 (13 DC)
ROW 7:- CH3, 2 DC in 1st DC *(CH1, Skip 1, DC) *repeat 5 times in total; CH1, Skip 1; 2 DC in last DC (9 DC 6 CH1)
ROW 8:- CH3, 2 DC in 1st DC (your increase) , DC into the CH stitch (you could go under the CH into the space; but if you go into the chain stitch it pulls the space out to look like a star shape), DC into the DC; and repeat across; 2 DC in last DC (your increase), turn (17 DC)
ROW 9:- Repeat Row 3 (19 DC)
ROW 10:- Repeat Row 3 (21 DC)
ROW 11:- Repeat Row 3 (23 DC)
ROW 12:- Repeat Row 3 (25 DC)
ROW 13:- Repeat Row 3 (27 DC)
ROW 14:- Repeat Row 7 (16 DC, 13 CH1)
ROW 15:- Repeat Row 8 (31 DC)
ROW 16:- Repeat Row 3 (33 DC) (at this point my piece measured 11 1/4”)
Begin the Centre Part of your Cowl – maintaining the width but still working on a diagonal.
ROW 17:- CH3, DC DEC (your decrease) using the 1st and 2nd DC; DC in each DC across; 2 DC (increase) in the last DC, turn (33 DC)
ROW 18:- CH3 2 DC in 1st DC (increase) DC across until 2 DC remain; DC DEC (your decrease) using the last 2 DC (33 DC)
ROW 19:- Repeat Row 17 (33 DC)
ROW 20:- Repeat Row 18 (33 DC)
ROW 21:- CH3, DC DEC using the 1st and 2nd DC; *(CH1, Skip 1, DC) *repeat 15 times in total; 2 DC in last DC (18 DC, 15 CH1)
ROW 22:- CH3, 2 DC in 1st DC (your increase) , DC into the next 2 DC , then DC into the CH stitch (you could go under into the space, but if you go into the stitch it pulls the space to look like a star shape), DC into the DC; and repeat across; DC DEC in last 2 DC (your decrease), turn (33 DC)
ROW 23:- Repeat Row 17
ROW 24:- Repeat Row 18
ROW 25:- Repeat Row 17
ROW 26:- Repeat Row 18
ROW 27:- Repeat Row 17
ROW 28:- CH3, 2 DC in 1st DC, *CH1, Skip 1, DC)*repeat 15 times in total; DC DEC in last 2 DC (18 DC, 15 CH1)
ROW 29:- CH3, DC DEC in 1st and 2nd DC, DC into the CH, repeat across; 2 DC in last DC. (33 DC)
ROW 30:- Repeat Row 18
ROW 31:- Repeat Row 17
(If you want a longer length Cowl then carry on repeating the Row sequence adding in your “Stars Row” at every 7th row)
I carried on till Row 59, (so I had 43 rows in my middle section) and then started my final section on Row 60.
Final section to decrease on both ends of your rows to finish in a corner.
You can make your cowl as long as you like, but begin your final section following a row ending in a decrease.
It will take you 16 rows to decrease back to a corner so just be sure to leave yourself sufficient yarn.
Begin Decrease.
Row 60:- CH3, DC DEC using the 1st and 2nd DC; DC into the next DC, and repeat across; DC DEC using the last 2 DC, turn (31 DC)
Row 61:- CH3, DC DEC using the 1st and 2nd DC; DC into the next DC, and repeat across; DC DEC using the last 2 DC, turn (29 DC)
Don’t forget to add in a Stars row when you are decreasing! Just decrease at each end of the row and then CH1, Skip 1, DC as before.
Remaining rows – repeat Rows 60 and 61, until you have 3 DC remaining.
FINAL ROW:- to make a neat corner, DC DEC all 3 DC together, the same way as you have been decreasing 2. CH3, Yrh, pull up loop from 1st DC, yrh, pull through 2 loops, yrh pull up loop from the 2nd DC, yrh, pull through 2 loops, yrh, pull loop up from 3rd DC, yrh, pull through 2 loops, yrh, pull through 2 loops, yrh, pull through 2 loops.
Cut your yarn, leaving a tail to weave in. Pull yarn through final loop on hook and then weave in the end to hide.
SEAMING:-
To seam together lay your piece flat on the floor and look again at my diagram

Spearmint Stars C2C Cowl with a twist using Lion Brand Scarfie in Mint/Silver from Crochet247
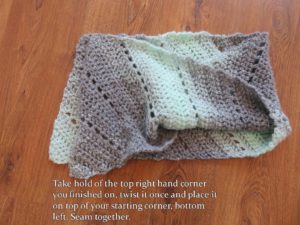
Pick up your finishing corner and make one full twist anti-clockwise before D lays on top of A and C lays on top of B.
Seam together the short ends. I crocheted them together using a UK HTR or a US HDC. But there are several methods depending on how noticeable you want the seam to be.

Spearmint Stars C2C Cowl with a twist using Lion Brand Scarfie in Mint/Silver from Crochet247
My method is just to bring the back piece and front piece together, yrh, go through stitches on both pieces, yrh, pull through, and pull through all three loops on the hook.
As I mentioned I didn’t block my cowl, and I haven’t added a border as I like the way it drapes as it is, even if it looks a little raw. By using the starting CH3, you have a nice even and bumpy edge which I think works well with the design.
Instructions written using UK crochet terms.
CH3 – Does not count as a stitch throughout.
ROW 1:- CH4 (counts as 1st TRC this time only), 2 TRC 4th CH from hook, turn (3 TRC)
ROW 2:- CH3 (remember it does not count), 2 TRC in 1st TRC (your increase) , TRC in next TRC, 2 TRC (your increase) in last TRC, turn (5 TRC)
ROW 3:- CH3, 2 TRC in 1st TRC (your increase) , TRC in next TRC, and repeat across; 2 TRC in last TRC (your increase), turn (7 TRC)
ROW 4:- Repeat Row 3 (9 TRC)
ROW 5:- Repeat Row 3 (11 TRC)
ROW 6:– Repeat Row 3 (13 TRC)
ROW 7:- CH3, 2 TRC in 1st TRC *(CH1, Skip 1, TRC) *repeat 5 times in total; CH1, Skip 1; 2 TRC in last TRC (9 TRC 6 CH1)
ROW 8:- CH3, 2 TRC in 1st TRC (your increase) , TRC into the CH stitch (you could go under the CH into the space; but if you go into the chain stitch it pulls the space out to look like a star shape), TRC into the TRC; and repeat across; 2 TRC in last TRC (your increase), turn (17 TRC)
ROW 9:- Repeat Row 3 (19 TRC)
ROW 10:- Repeat Row 3 (21 TRC)
ROW 11:- Repeat Row 3 (23 TRC)
ROW 12:- Repeat Row 3 (25 TRC)
ROW 13:- Repeat Row 3 (27 TRC)
ROW 14:- Repeat Row 7 (16 TRC, 13 CH1)
ROW 15:- Repeat Row 8 (31 TRC)
ROW 16:- Repeat Row 3 (33 TRC) (at this point my piece measured 11 1/4”)
Begin the Centre Part of your Cowl – maintaining the width but still working on a diagonal.
ROW 17:- CH3, TRC DEC (your decrease) using the 1st and 2nd TRC; TRC in each TRC across; 2 TRC (increase) in the last TRC, turn (33 TRC)
ROW 18:- CH3 2 TRC in 1st TRC (increase) TRC across until 2 TRC remain; TRC DEC (your decrease) using the last 2 TRC (33 TRC)
ROW 19:- Repeat Row 17 (33 TRC)
ROW 20:- Repeat Row 18 (33 TRC)
ROW 21:- CH3, TRC DEC using the 1st and 2nd TRC; *(CH1, Skip 1, TRC) *repeat 15 times in total; 2 TRC in last TRC (18 TRC, 15 CH1)
ROW 22:- CH3, 2 TRC in 1st TRC (your increase) , TRC into the next 2 TRC , then TRC into the CH stitch (you could go under into the space, but if you go into the stitch it pulls the space to look like a star shape), TRC into the TRC; and repeat across; TRC DEC in last 2 TRC (your decrease), turn (33 TRC)
ROW 23:- Repeat Row 17
ROW 24:- Repeat Row 18
ROW 25:- Repeat Row 17
ROW 26:- Repeat Row 18
ROW 27:- Repeat Row 17
ROW 28:- CH3, 2 TRC in 1st TRC, *CH1, Skip 1, TRC)*repeat 15 times in total; TRC DEC in last 2 TRC (18 TRC, 15 CH1)
ROW 29:- CH3, TRC DEC in 1st and 2nd TRC, TRC into the CH, repeat across; 2 TRC in last TRC. (33 TRC)
ROW 30:- Repeat Row 18
ROW 31:- Repeat Row 17
I carried on till Row 59, (so I had 43 rows in my middle section) and then started my final section on Row 60.
(If you want a longer length Cowl then carry on repeating the Row sequence adding in your “Stars Row” at every 7th row)
Final section to decrease on both ends of your rows to finish in a corner.
You can make your cowl as long as you like but begin your final section following a row ending in a decrease.
It will take you 16 rows to decrease back to a corner so just be sure to leave yourself sufficient yarn.
Begin Decrease.
Row 60:- CH3, TRC DEC using the 1st and 2nd TRC; TRC into the next TRC, and repeat across; TRC DEC using the last 2 TRC, turn (31 TRC)
Row 61:- CH3, TRC DEC using the 1st and 2nd TRC; TRC into the next TR C, and repeat across; TRC DEC using the last 2 TRC, turn (29 TRC)
Don’t forget to add in a Stars row when you are decreasing! Just decrease at each end of the row and then CH1, Skip 1, TRC as before.
Remaining rows – repeat Rows 60 and 61, until you have 3 TRC remaining.
FINAL ROW:- to make a neat corner, TRC DEC all 4 TRC together, the same way as you have been decreasing 2. CH3 Yrh, pull up loop from 1st TRC, yrh, pull through 2 loops, yrh pull up loop from the 2nd TRC, yrh, pull through 2 loops, yrh, pull loop up from 3rd TRC, yrh, pull through 2 loops, yrh, pull through 2 loops, yrh, pull through 2 loops.
Cut your yarn, leaving a tail to weave in. Pull yarn through final loop on hook and then weave in the end to hide.
SEAMING:-
To seam together lay your piece flat on the floor and look again at my diagram
Pick up your finishing corner and make one full twist anti-clockwise before D lays on top of A and C lays on top of B.
Seam together the short ends. I crocheted them together using a UK HTR or a US HDC. But there are several methods depending on how noticeable you want the seam to be.
My method is just to bring the back piece and front piece together, yrh, go through stitches on both pieces, yrh, pull through, and pull through all three loops on the hook.
As I mentioned I didn’t block my cowl, and I haven’t added a border as I like the way it drapes as it is, even if it looks a little raw. By using the starting CH3, you have a nice even and bumpy edge which I think works well with the design.
Any questions contact me at sarah@crochet247.com

Spearmint Stars Cowl with a twist using Lion Brand Scarfie in Mint/Silver from Crochet247 free crochet pattern
Did you like the new pattern? Please remember to PIN/LIKE/SHARE on Facebook/Instagram/Pinterest so others can find me, and you don’t miss any new patterns coming soon!
Facebook Page – Crochet 24/7
Facebook Group – Crochet 24/7 Club – Crochet Together
Instagram – @crochet247
Pinterest – Crochet247
Ravelry – Crochet247

Spearmint Stars Cowl with a twist using Lion Brand Scarfie in Magenta/Black from Crochet247 free crochet pattern
I have recently started a Facebook Group – Crochet 24/7 Club – Crochet Together so it’s easier for me to talk to all of you, and you can share with me your pictures of what you are all working on. It would be so great if you could join my group
All new subscribers to my newsletter will receive a Ravelry code in their welcome email for a free PDF of my crochet pattern New Beginning Infinity Cowl.
@Copyright 2017 Sarah Sullivan owner of Crochet247.com. This pattern is my own original design and whilst you may sell any finished articles you make from the pattern at craft fairs, Etsy etc. please always add a link back to my blog/website and provide credit for the pattern.
If you would like to share the pattern on social media please ensure that if you Pin etc. that you provide the link back directly to my website post.
If you want to share the pattern on your own website/blog then please use just the first photo in the post and link back to my original post.
You may not copy and paste my patterns; or give away printed copies of this pattern or my blog post on the pattern


In the picture on the model the cowl is twisted. Did you do this before joining the short ends? Mine never turn out.
Hi Cindy
Yes I twisted it once before I seamed it.
Regards
Sarah
Lovely! Thank you for sharing the pattern.
Thank-you Ren so glad you like it! Show me a picture if you make it!