Ocean Kiss Afghan Square

Ocean Kiss Afghan Square Crochet Pattern designed for the Creative Crossings Afghan
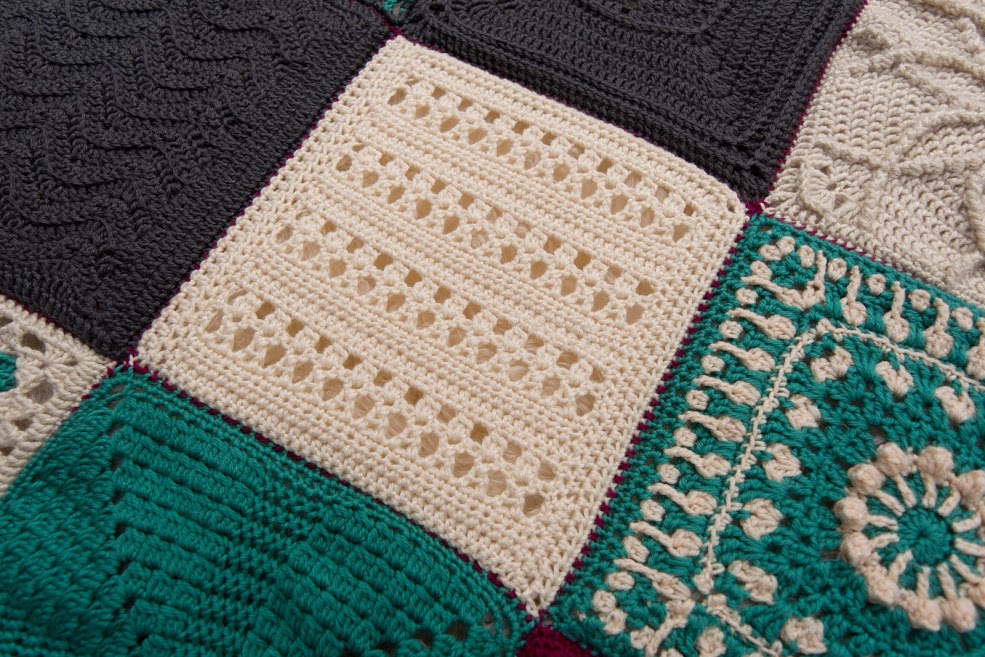
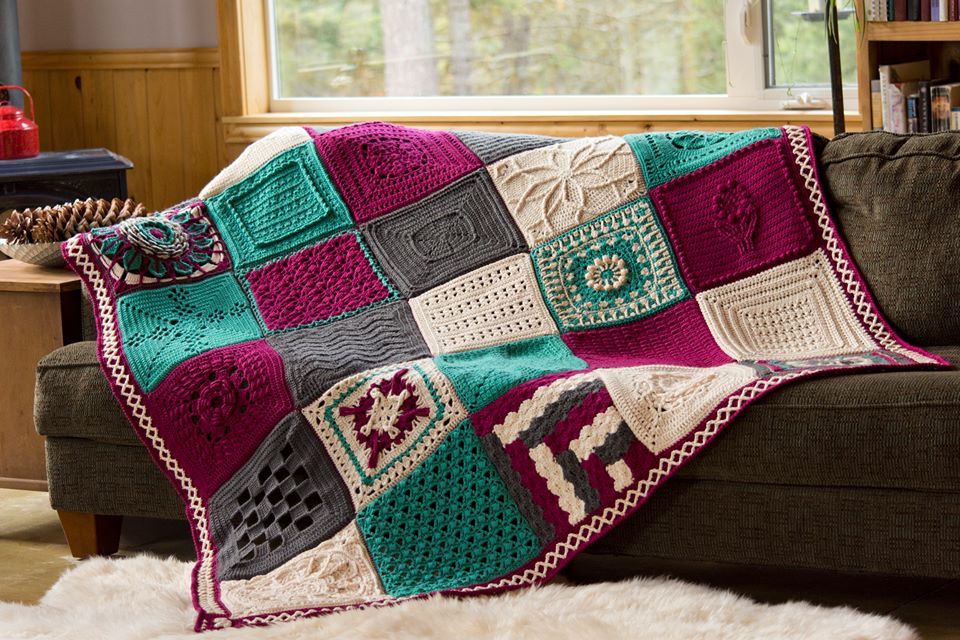
Ocean Kiss Afghan Square – Free Crochet Square Pattern, an original design contributed for the Creative Crossings Afghan Blanket, you will find my square on the 4th row in the Red Heart Soft shade Off-White!
Fifteen crochet designers contributed brand new designs for this beautiful blanket full of texture and colour as a gift for Lorene from Cre8tion Crochet. Read the full story below!

Image courtesy of Kirsten Holloway Designs Creative Crossings Afghan/Blanket
Back in 2017, I was honoured to be a part of a wonderful beta group established by Lorene Haythorn Eppolite from Cre8tion Crochet. Lorene wanted to help others to establish themselves as small business owners using their craft skills to earn an income.
The group became the Cre8tion Business Academy providing daily support, guidance and reference for creative business owners. For those of us blessed with a creative brain we can easily experience total overwhelm when trying to steer our way through the skill set and tasks we need to master to sell and promote our products on-line.
When you create your product you design and make it, but to promote it you need to master all of the social media – Facebook, Instagram, Pinterest, your own website. To ensure your product stands out in a busy market place you need good photographs, great written copy, beautiful pins for Pinterest. To promote your product you need to place links in Facebook Groups, learn how to schedule links and pins – it goes on and on.
I highly recommend Lorene as a mentor, she is a crochet designer, and she has built a successful design business so understands our daily struggles and time management, and the problems when real life gets in the way of all of your plans.
Our beta group wanted to give something back; to show Lorene how much we all appreciated; and had benefited so much from her group, and the friendship, and sense of community we all had with each other.
Kirsten from Kirsten Holloway Designs had the wonderful idea of designing and making Lorene an afghan. The idea was for each of the group members to design individual squares for the afghan and make it in Lorene’s business brand colours.
The entire project took almost a year to come to fruition from planning, to making the finished afghan, Kirsten had the lion’s share of the project organising the project, contributing her own squares, stitching all the squares together.
Then, Kirsten also designed and stitched a stunning border, that really just takes the afghan to another level of beauty, don’t you think?
Finally, Kirsten also took and edited beautiful photos of all of our squares, and the final photos of the completed afghan which she has generously given to all of the designers who took part to help them promote the afghan.
We couldn’t have possibly done it without her, Kirsten’s time and patience on this project, freely given is amazing and very much appreciated by us all. Thank-you Kirsten!
For full details of the final measurements of the
complete blanket, and the links to all of the
squares; visit Kirsten’s blog post
by clicking here.

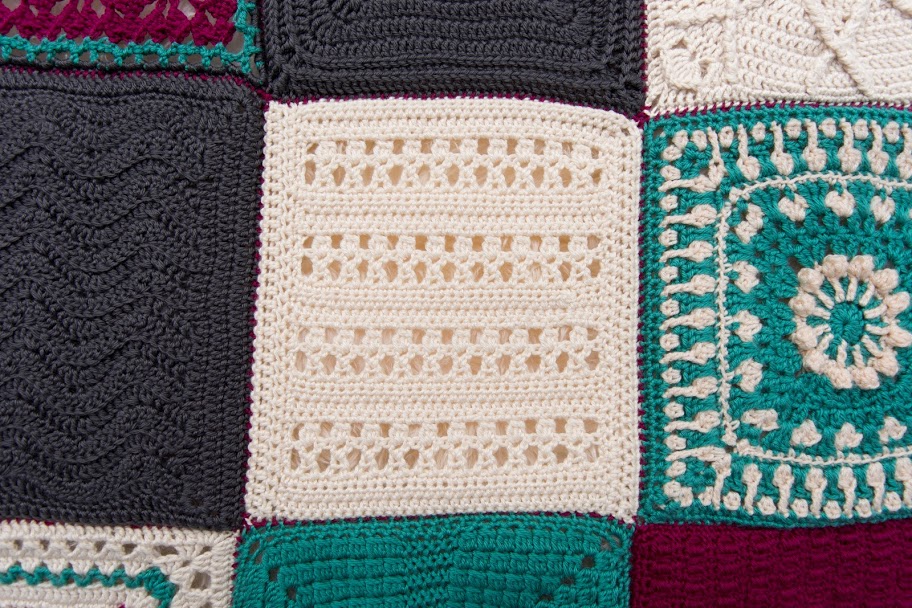
Ocean Kiss Square from Creative Crossings Afghan Blanket
My square Ocean Kiss was an extra nice collaboration with my friend Katie Clary from Salty Pearl Crochet. I wanted to take part in the project, but the shipping costs from the UK to USA were prohibitive, and at the time we were all trying to work to a deadline.
Katie offered to make the square from my pattern, on my behalf, and then mail it on to Kirsten. This was so generous of Katie and enabled me to be included in this very special blanket.
I decided to use my very popular Ocean Kiss series to design the Ocean Kiss Afghan Square using the same stitch combination as my patterns in this series, and then add a border to ensure the square would be 12″ by 12″.
Pattern instructions are below and as usual I have included two sets one for USA crochet terms and one for UK.
If you prefer an inexpensive ad-free PDF of my square pattern, please click here to purchase from my Ravelry store.
Ocean Kiss Afghan Square 12 x 12 inches
Difficulty Level: – Intermediate
Stitches Used: –
USA TERMS UK TERMS
CH – Chain CH – Chain
SC – Single Crochet DC – Double Crochet
HDC – Half Double Crochet HTR – Half Treble Crochet
DC – Double Crochet TRC – Treble Crochet
TRC – Treble Crochet DTR – Double Treble Crochet
Special Stitches Used : –
USA – TRX:- (Treble “X” shape worked over 3 stitches)
Yarn round hook (yrh) twice, insert hook in next SC, yrh, pull loop through, yrh, pull loop through first 2 loops on hook, skip the next SC, yrh, insert hook into next SC, yrh, pull loop through, (yrh, pull loop through 2 loops on hook) 4 times, CH1, yrh, insert hook into bottom space of the X you are making, yrh, pull loop through, (yrh, pull loop though 2 loops) twice
UK – DTRX:- (Double Treble “X” shape worked over 3 stitches)
Yarn round hook (yrh) twice, insert hook in next DC, yrh, pull loop through, yrh, pull loop through first 2 loops on hook, skip the next DC, yrh, insert hook into next DC, yrh, pull loop through, (yrh, pull loop through 2 loops on hook) 4 times, CH1, yrh, insert hook into bottom space of the X you are making, yrh, pull loop through, (yrh, pull loop though 2 loops) twice
USA – DC Cluster:- DC3TOG:- (3 Double Crochets worked together in the same stitch)
Yarn round hook (yrh), insert hook into the CH1 space forming the top half of your “X” , pull loop through yrh, pull through 2 loops, yrh, insert hook back into same space, yrh, pull loop through, yrh, pull through 2 loops, yrh, insert hook back into same space, yrh, pull loop through, yrh, pull through 2 loops, yrh, pull through remaining 4 loops.
UK – TRC Cluster:- TR3TOG:- (3 Treble Crochets worked together in the same stitch)
Yarn round hook (yrh), insert hook into the CH1 space forming the top half of your “X” , pull loop through yrh, pull through 2 loops, yrh, insert hook back into same space, yrh, pull loop through, yrh, pull through 2 loops, yrh, insert hook back into same space, yrh, pull loop through, yrh, pull through 2 loops, yrh, pull through remaining 4 loops.
Yarn Used: – Red Heart Soft – about 70g needed, but any Worsted/Aran weight would work. If you are not familiar with Red Heart Soft then take a look at this video
Hook Size Used: – 5.5mm crochet hook
Gauge: – 3” horizontal 10 US HDC/UK HTR; 4 X stitches = 3.5” ; 3” vertical – one repeat of Rows 2-7
Instructions written using USA crochet terms.
CH1 – Does not count as a stitch
CH4 – Counts as the first TRC stitch on “X” rows, meaning the very first space to place a stitch, is already “used”. And also counts as the first DC/CH1 on DC Cluster rows.
Multiple 3+2+1 for the foundation chain.
ROW 1:- CH33, SC in 2nd CH from hook, SC in each CH to end of row. (32 SC), turn
ROW 2:- CH1, HDC in each SC, repeat across, (32 HDC), turn
ROW 3:- CH1, HDC in each HDC, repeat across, (32 HDC), turn
ROW 4:- CH1, SC in each HDC, repeat across, (32 SC), turn
ROW 5:- CH4 (counts as a TRC), TRX across, ending with a TRC in final SC (10 TRX, 2 TRC), turn
ROW 6:– CH4, *(DC Cluster (space in top half of first “X”), CH2), repeat a further 8 times, final “X” DC Cluster, CH1, DC in 4th CH, turn (10 DC Cluster, 2 DC)
ROW 7:- CH1, SC into previous row DC, SC in the CH1 space, *(SC through top of DC3TOG Cluster, 2 SC in CH2 space), *repeat across ending with SC through top of final cluster, SC under CH1 space (4th CH previous row), then SC in 3rd CH of previous row. (32 SC)
Check your count here, the easiest place to miss a SC is either the first 2, (the SC in the first cluster is your 3rd SC made) or the last 2 SC’s (made using the starting CH4 of the previous row).
ROW 8:- CH1, HDC in each SC, repeat across, (32 HDC), turn
ROW 9:- CH1, HDC in each HDC, repeat across, (32 HDC), turn
ROW 10:- CH1, SC in each HDC, repeat across, (32 SC), turn
ROW 11:- CH4 (counts as a TRC), TRX across, ending with a TRC in final SC (10 TRX, 2 TRC), turn
ROW 12:– CH4, *(DC Cluster (space in top half of first “X”), CH2), repeat a further 8 times, final “X” DC Cluster, CH1, DC in 4th CH, turn (10 DC Cluster, 2 DC)
ROW 13-28:- Repeat Rows 7-12, two more times
ROW 29 – Repeat Row 7 (32 SC), at the end of the row do not turn, CH1 and SC into the same stitch and then work a further 31 SC down the raw side evenly spaced.
Side Border
Essentially you are adding 4 border rows to the two sides that have raw edges. SC/HDC/HDC/SC to match the pattern and make a neat corner on each side with a CH1.
To keep it even I worked with one side and the top row at the same time and then finished the final raw side with the same 4 rows.
So I worked a row of SC across the top of my square, turned the corner and went down one side, come back up the side and across the top with HDC, turn and go back and do another row of HDC up the side and back across the top, turn and your final row is then SC back up the side and across the top. This brings you to your final raw side when you can then repeat the same four rows to finish the square evenly.
ROW 30 – CH1, turn and work back along the side an HDC into each SC, (32 HDC), CH1, and continue placing your HDC into each SC across the top of your square (32 HDC), turn, CH1
ROW 31 – CH1, and with HDC into each HDC work again across the top of the square and down the side placing another row of HDC into each HDC. (2 sides of 32 HDC), turn,
ROW 32 – CH1, SC into each HDC final time back up the side and across the top of the square. 2 sides of 32 SC with a CH1 for the corner.
ROW 33 – CH1, and SC again evenly spaced place 32 SC down your final side, turn,
ROW 34 – CH1, return back along the side towards the top placing an HDC into each SC,
Row 35 – CH1, turn, another row down of HDC into each HDC.
Final Row – CH1, turn, SC into each HDC and your square should be complete.
Cut your yarn, leaving a tail to weave in. Pull yarn through final loop on hook and then weave in the end to hide.
Instructions written using UK crochet terms.
CH1 – Does not count as a stitch
CH4 – Counts as the first DTR stitch on “X” rows, meaning the very first space to place a stitch, is already “used”. And also counts as the first TRC/CH1 on TRC Cluster rows.
Multiple 3+2+1 for the foundation chain.
ROW 1:- CH33, DC in 2nd CH from hook, DC in each CH to end of row. (32 DC), turn
ROW 2:- CH1, HTR in each DC, repeat across, (32 HDR), turn
ROW 3:- CH1, HTR in each HTR, repeat across, (32 HTR), turn
ROW 4:- CH1, DC in each HTR, repeat across, (32 DC), turn
ROW 5:- CH4 (counts as a DTR), DTRX across, ending with a DTR in final DC (10 DTRX, 2 DTR), turn
ROW 6:– CH4, *(TRC Cluster (space in top half of first “X”), CH2), repeat a further 8 times, final “X” TRC Cluster, CH1, TRC in 4th CH, turn (10 TRC Cluster, 2 TRC)
ROW 7:- CH1, DC into previous row TRC, DC in the CH1 space, *(DC through top of TRC3TOG Cluster, 2 DC in CH2 space), *repeat across ending with DC through top of final cluster, DC under CH1 space (4th CH previous row), then DC in 3rd CH of previous row. (32 DC)
Check your count here, the easiest place to miss a DC is either the first 2, (the DC in the first cluster is your 3rd DC made) or the last 2 DC’s (made using the starting CH4 of the previous row).
ROW 8:- CH1, HTR in each DC, repeat across, (32 HTR), turn
ROW 9:- CH1, HTR in each HTR, repeat across, (32 HTR), turn
ROW 10:- CH1, DC in each HTR, repeat across, (32 DC), turn
ROW 11:- CH4 (counts as a DTR), DTRX across, ending with a DTR in final DC (10 DTRX, 2 DTR), turn
ROW 12:– CH4, *(TRC Cluster (space in top half of first “X”), CH2), repeat a further 8 times, final “X” TRC Cluster, CH1, TRC in 4th CH, turn (10 TRC Cluster, 2 TRC)
ROW 13-28:- Repeat Rows 7-12, two more times
ROW 29 – Repeat Row 7 (32 DC), at the end of the row do not turn, CH1 and DC into the same stitch and then work a further 31 DC down the raw side evenly spaced.
Side Border
Essentially you are adding 4 border rows to the two sides that have raw edges. DC/HTR/HTR/DC to match the pattern and make a neat corner on each side with a CH1.
To keep it even I worked with one side and the top row at the same time and then finished the final raw side with the same 4 rows.
So I worked a row of DC across the top of my square, turned the corner and went down one side, come back up the side and across the top with HTR, turn and go back and do another row of HTR up the side and back across the top, turn and your final row is then DC back up the side and across the top. This brings you to your final raw side when you can then repeat the same four rows to finish the square evenly.
ROW 30 – CH1, turn and work back along the side an HTR into each DC, (32 HTR), CH1, and continue placing your HTR into each DC across the top of your square (32 HTR), turn, CH1
ROW 31 – CH1, and with HTR into each HTR work again across the top of the square and down the side placing another row of HTR into each HTR. (2 sides of 32 HTR), turn,
ROW 32 – CH1, DC into each HTR final time back up the side and across the top of the square. 2 sides of 32 DC with a CH1 for the corner.
ROW 33 – CH1, and DC again evenly spaced place 32 DC down your final side, turn,
ROW 34 – CH1, return back along the side towards the top placing an HTR into each DC,
Row 35 – CH1, turn, another row down of HTR into each HTR.
Final Row – CH1, turn, DC into each HTR and your square should be complete.
Cut your yarn, leaving a tail to weave in. Pull yarn through final loop on hook and then weave in the end to hide.
Any questions contact me at sarah@crochet247.com
Have you found me on social media?
Website:- www.crochet247.com
Facebook Page:- Crochet 24/7
Facebook Group:- Crochet 24/7 Club – Crochet Together
Pinterest:- Crochet247Design
@Copyright 2017 Sarah Sullivan owner of Crochet247.com. This pattern is my own original design and whilst you may sell any finished articles you make from the pattern at craft fairs, Etsy etc. please always add a link back to my blog/website and provide credit for the pattern.
If you would like to share the pattern on social media please ensure that if you Pin etc. that you provide the link back directly to my website post.
If you want to share the pattern on your own website/blog then please use just the first photo in the post and link back to my original post.
You may not copy and paste my patterns or make your own PDF; or give away printed copies of this pattern or my blog post on the pattern